Tuesday, April 23, 2013
Friday, April 19, 2013
perfume advertisesment
Monday, April 15, 2013
glamour shot
With this I first added a blur over the layer and then brushed over my face to keep it clear. Then I made a selection around my face and did the inverse and added the vignette around my face. and voila!
Friday, April 12, 2013
Makeover
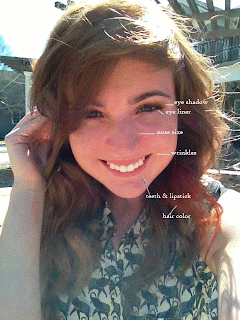
I changed my hair color with the quick mask mode and then inverse selection and change color. I whitened my teeth by making a selection around my teeth creating a new layer with it and using the screen mode. I did the eyeliner by simply painting on eyeliner with a light opacity around my eyes. I did the same for the eye shadow. changed my lip color by simply picking a natural darker color of my natural lips and painting that on with an opacity I got rid of my wrinkles by with the healing brush tool. and voila.
Thursday, April 11, 2013
skin tone
With this I made a selection of the original problem area and the filled it with the color surrounding it in order for it to be even
Wednesday, April 10, 2013
Wrinkle Removal
I used the healing brush tool in order to clone the skin without wrinkles over the skin with wrinkles.
Whiten Teeth
I made a selection of the teeth and copied it into a new layer in screen mode lowering the opacity to give it a whiter effect and then I used curves to make it more natural looking.
Eye Makeup
I used multiple layers in order to create a soft dramatic eye make up. In the first layer I used color mode and colored the eye lid. In the second layer I used soft light and added the purple, and in the third layer I used multiply to do the eyeliner.
Change Hair Color
I used the Quick Mask mode then selected the parts of hair I wanted purple with a brush and changed the hues and saturation to get this look.
Tuesday, April 9, 2013
modify nose
In this tutorial I learned how to use the lasso and liquify and pucker tool in order to shrink down her nose.
Removing object from photo
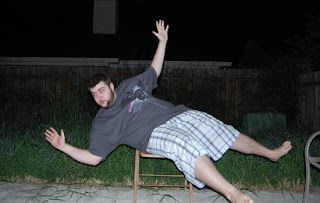
With this tutorial I learned how to use the eraser tool and the polygonal tool in order to remove the chair from under the man.
Thursday, April 4, 2013
clone/healing/repair tools
Monday, April 1, 2013
Advertisement

Final Product.
My target audience was students. Since students are younger I chose a vintage sort of look with books. I chose faded deeper colors to give it a retro sort of old look. I chose a type writer sort of font as well to add to the retro look. I added a faded wood layer mask over the whole picture to make it look more vintage. And voila. Here's to some Good Morning Sunshine Coffee!
Subscribe to:
Comments (Atom)


.JPG)


.gif)


